Setting Up
Starting to shoot video can be overwhelming at first. There are so many things to think about and if you are a one man operator it can be a lot to juggle. In this section we go through all the things you need to think about before you start shooting video.
The first thing to make sure is that your camera is set up for video. There are a number of settings we need to check before we can start to shoot.
This video introduces you to the basics of setting up your camera so you can start shooting video.
Frame Size
The first decision to be made is our frame size, this is the size of the video frame we are recording. It’s generally best to record at the highest frame size which for DSLR cameras is 1920×1080 also known as full HD. There are other options such as 1280 x 720 or Web HD but where ever possible record video at your highest size possible.
Frame Rate
The next option is the frame rate, this is the number of frames per second (FPS) the camera records. There is no real right or wrong answer here. Generally most DSLR cameras will have three options NTSC (30 FPS), PAL or (25 FPS) and lastly the cinematic looking (24FPS). If your video will be broadcast on TV, the region you are in, either NTSC (30) or PAL (25), will dictate your frame rate. If your video is only going to be published online then you are free to choose 30, 25 or 24 FPS. What is important is that you stick to a frame rate for each project as otherwise you will run the risk of having dropped frames in your video.
Audio
There are two options on your camera to control how your camera records audio; manual and auto levels. If you are recording general audio then auto levels using a shotgun microphone will be ok but make sure you check your levels every now and again to make sure you don’t clip your audio. If you are recording any dialogue or interviews then you must use manual levels to prevent the auto gain in your camera boosting noise. When using manual levels make sure you perform a quick sound test to make sure you set your levels correctly.
Focus
Focus can be tricky on DSLR cameras but there is a quick focus set up which will help you find focus quickly. Select quick focus in the camera menu and then use the AF button on the back of the camera to quickly focus on your subject. Alternatively you can use the zoom function and focus manually on your subject. Remember you must use manual focus whilst you are recording.
Planning

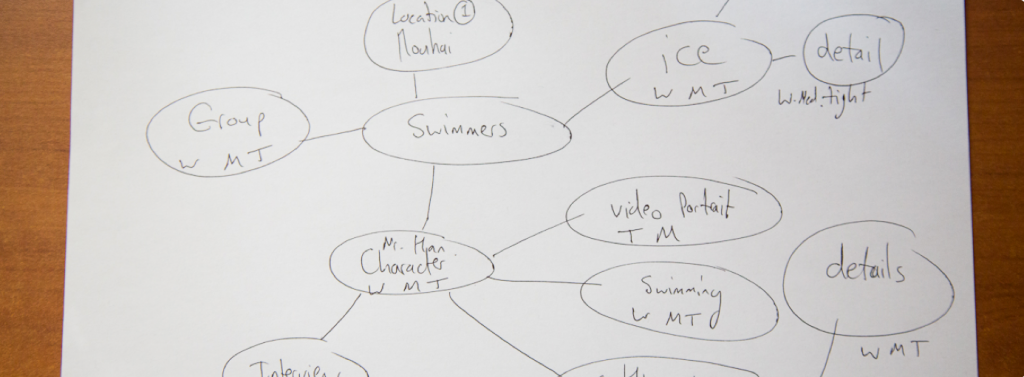
Before you start producing a video sit down and think about how and what sort of a story you want to tell in your video. Are there any central characters? Where will you shoot? Are there any must get shots? How many people will you interview? It’s a good idea to at least do some preparation before you go out and shoot so that you make sure you get the right shots, a good interview and also some interesting visuals. You don’t want to pre-conceive the whole of your video before you head out in the field but you do want to start to visualize the video in your head, I often find making a mind map helps me plan my videos. The mind map helps me to make a shot list, think of any interviews I need to conduct and questions I need to ask, and finally the locations I need to visit.
Continue on to the following video sections in this module:
